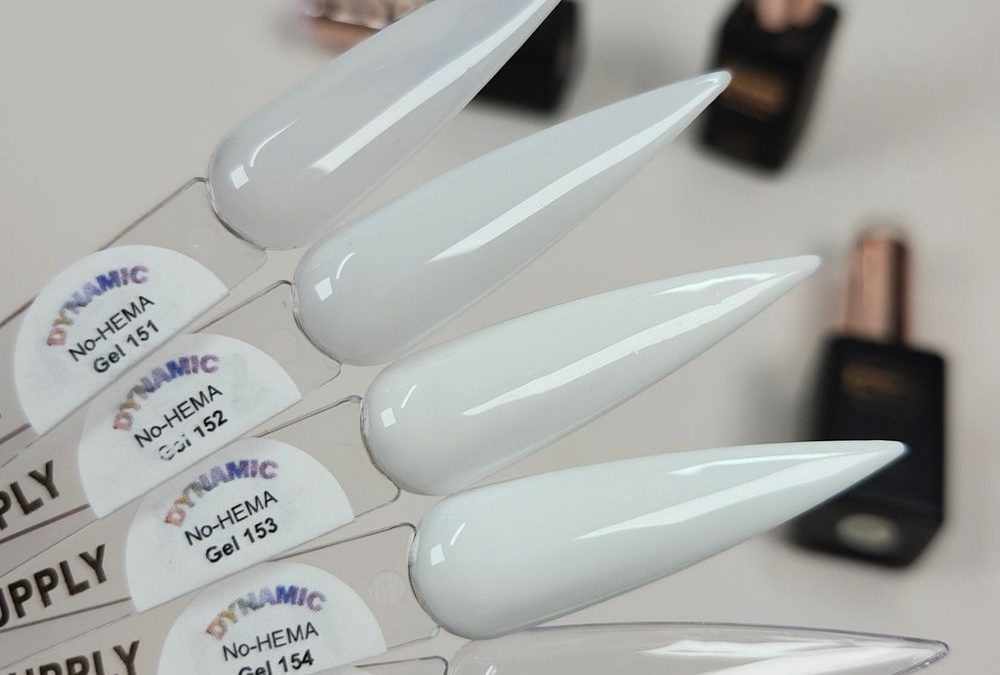
Looking to add a delicate, wearable ombré to your spring service menu that clients can wear to work or a wedding? This tutorial walks you through a salon-efficient workflow to create lavender baby pink gradient nails using the soft, high-gloss crème gels in the Dynamic No-HEMA Color 151–160 range.
Create a soft seamless fade that reads fresh in photos
Start with a clear plan for value transitions: these shades move from near-whites and milky tones into very pale pinks and a pastel lavender, so the fade should be judged by translucency, not pigment strength. For short or medium lengths aim for a gentle midpoint blend—too abrupt and the set reads striped rather than ombré. For longer nails you can stretch the transition across more surface area so each shade reads more distinct yet still blended.
Prep and base steps that protect the nail and lock the gloss
Efficient prep prevents lifting and banding during blending. File to the client’s preferred shape, dehydrate lightly, and remove any dust. Use a thin, even base designed for gel polish—one that allows the next layers to level. Because these gels are thicker and pigmented for easy coverage, apply thin base layers to avoid doming near the free edge. Cure fully between each stage: plan 60–120 seconds per lamp recommendations to stabilize the film before color work.
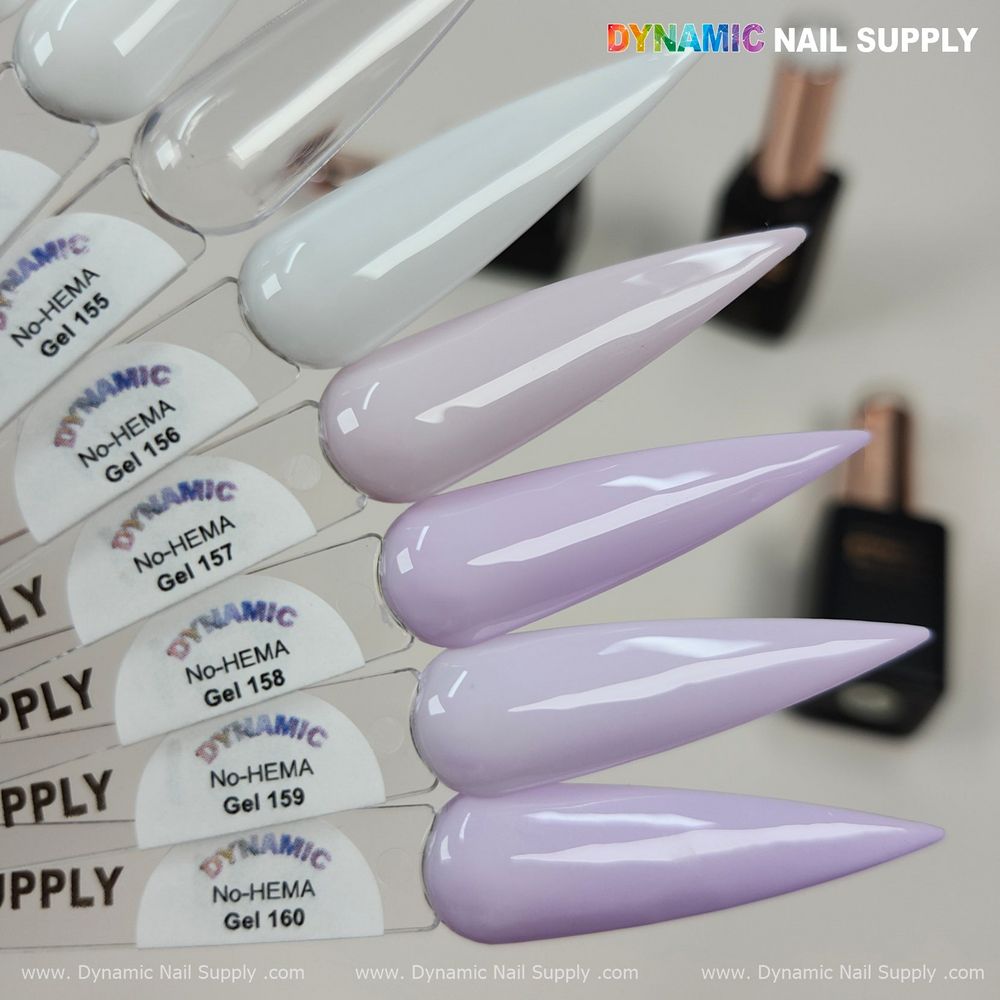
Transparent sample pairs with opaque near-whites for balance
Tools, brush strokes and the two-pass layering method
Keep your station compact: two separate, clean gel brushes (a flat oval and a small fan or shader), a gel color cup with small dots of each shade, and a lint-free wipe with isopropyl for tack removal. The two-pass method below prevents visible brush marks and banding on the gradient.
- Thin first pass: Apply a very sheer veil of the lavender near the tip and a sheer veil of baby pink near the cuticle area on each nail, leaving a soft overlap in the center. Use long, light strokes with the flat oval brush—think smoothing, not painting. Cure 60–90s.
- Feathered second pass: With the shader brush lightly loaded, pick up pigment from both colors at the overlap and use tiny feather strokes to push pigment toward the center from both directions. Work quickly but lightly so the previous cured veil accepts the new layer without pooling. Cure fully 60–120s depending on your lamp power.
Because the set includes multiple near-white and milky shades, you can insert a milky white veil in the center before the second pass if you need a softer midpoint. This reduces the appearance of any cold line where cool lavender meets warm pink.
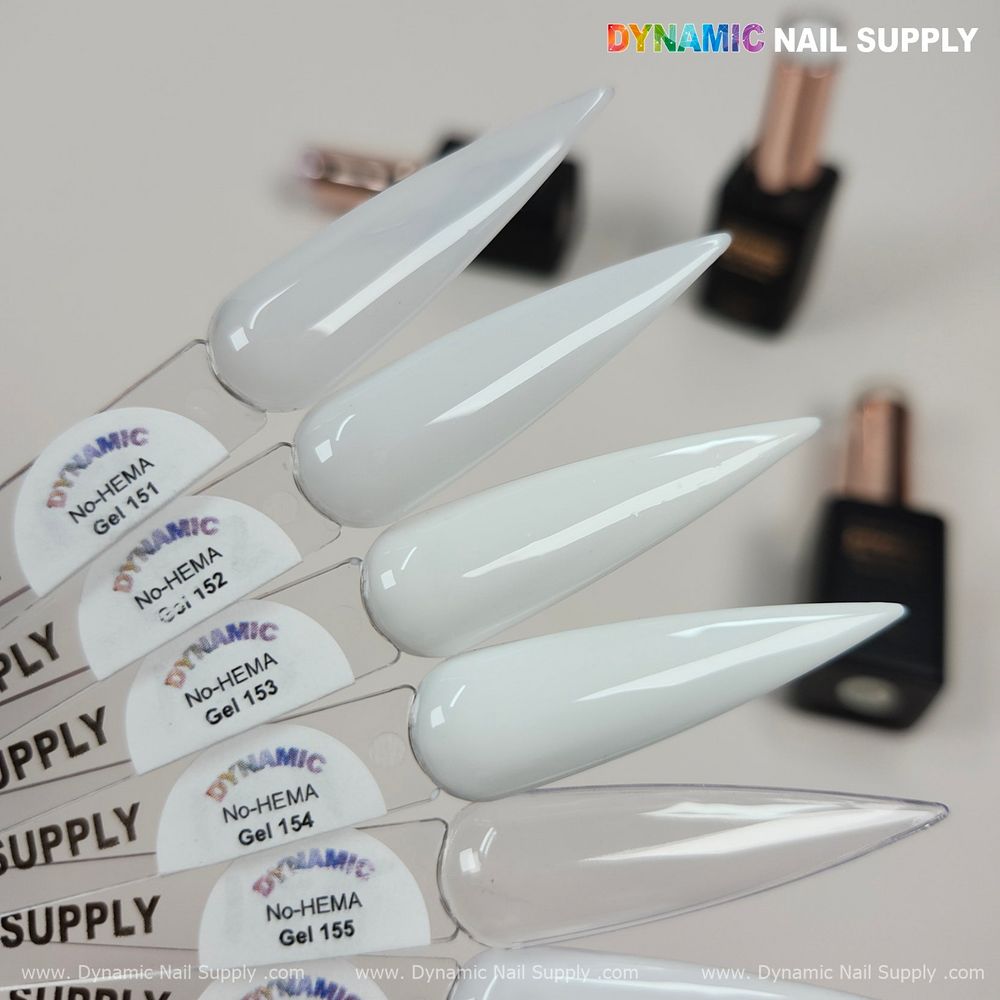
Pastel lavender through milky white in a glossy crème finish
Balance opacity: how to choose which shades to use and when
Pick a lavender and a baby pink from the 10 shades that read most pastel on the swatches—lean toward the creamier samples for a clean, glossy fade. If the client wants a very subtle effect, use a transparent or milky white as one layer and build one pastel as the second layer so the finish reads sheer and luminous. For a more opaque ombré, use two thin coats per shade and blend on the second coat using the feathering technique above.
Product bottles in this range are thicker and designed to cover easily, so resist loading the brush too heavily. A little product goes a long way when you’re creating a gradient.
Try adding a single clear accent nail into the set to show off the transparent sample from the palette; it gives the overall hand a deliberate, modern pause without competing with the ombré.
Consider adding a thin milky veil from the No-HEMA gel polish set to soften the midpoint before your final feather pass.
Special attention: No-HEMA Gel 151 — the bright opaque white anchor
No-HEMA Gel 151 reads as a bright, opaque white in this palette and makes an excellent anchor for contrast or a crisp smile line. Use it sparingly on tips when you want a clean French edge or on one or two accent nails to frame the pastel fade. When blended directly into the lavender and baby pink, it can brighten the midpoint and help the transition read cleaner in photos—apply thinly and cure fully to avoid harsh edges.
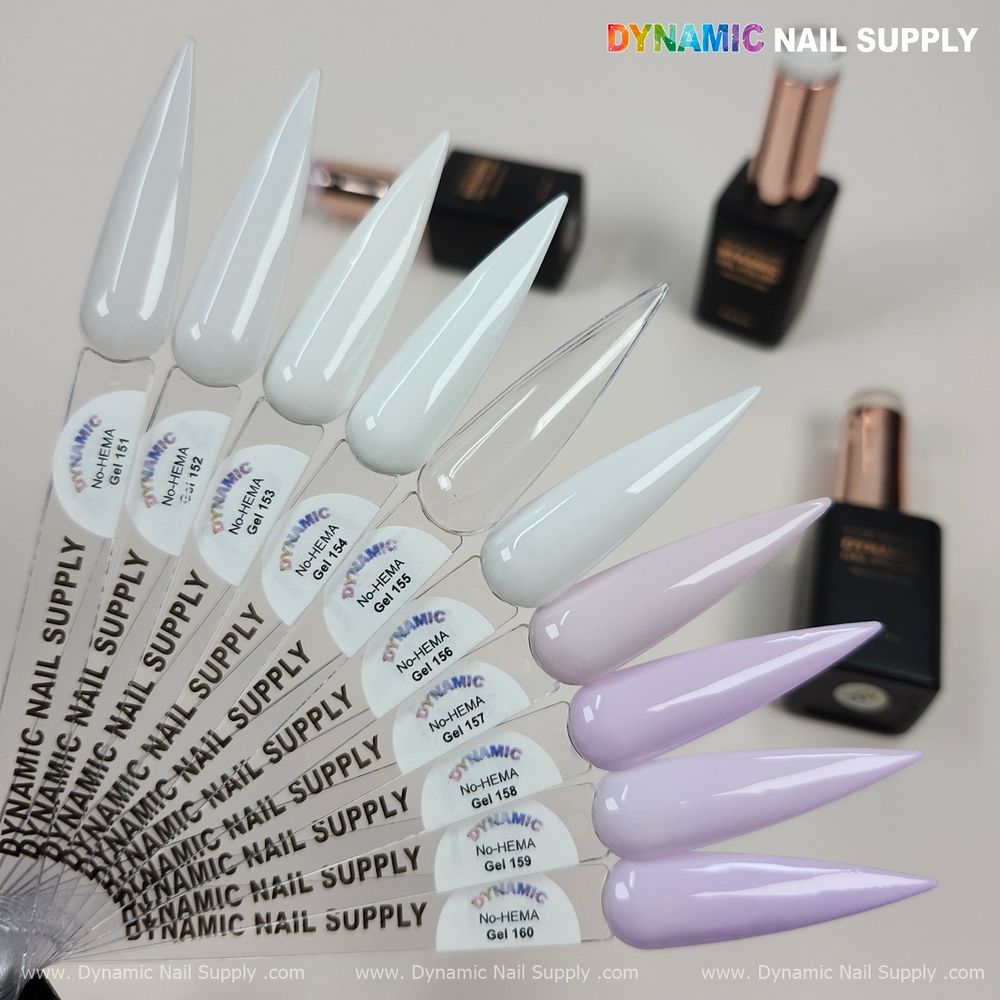
Soft baby pink to lavender gradient, salon gloss
Finishing steps: glossy seal, edge work, and curing strategy
After the color is blended and fully cured, wipe the inhibition layer clean and check the free edge for thinness. Apply a high-gloss top coat in a thin, even layer to maintain the salon sheen. Seal the free edge with a slight pull-down motion on the brush and cure for the full top-coat time recommended by your lamp. Let the client know that a thin top coat is the best insurance against tip wear on this soft pastel surface.
Quick troubleshooting and prevention for banding
- If you see horizontal banding: you likely overloaded the brush or rushed curing—file the film edge slightly, then repeat the thin-pass blend and cure fully.
- If the fade reads blotchy: ease back by adding a very thin veil of milky white over the center and feather again; this softens contrast without losing color.
- For tacky or sagging edges: check lamp output and cure slightly longer, 10–30s increments, until the film is stable.
Numbered checklist: Salon service flow for a lavender baby pink gradient nails set
- Consult: choose length, shape, and opacity level with the client.
- Prep: shape, lightly buff, and dehydrate; apply thin base layer and cure.
- First pass: sheer lavender at tips, sheer baby pink at cuticles; cure.
- Second pass: feather overlap with small strokes; cure.
- Optional: add a milky veil to soften midpoint; cure.
- Clean inhibition layer, inspect edges, apply thin high-gloss top coat and cure.
- Final finish: wipe, apply cuticle oil, and give brief aftercare notes.
Safety and handling notes for salon pros
Work in a well-ventilated area and use gloves if prolonged skin contact is likely. Avoid uncured gel staying on skin by keeping layers thin and curing between passes. Store bottles upright, away from direct heat and light. If you choose to offer the whole set, bottles start at $8 each; prices may change.
Who should buy: Nail techs and busy DIYers who want a delicate, photo-ready spring ombré from a HEMA-free, high-gloss crème palette. This set suits clients seeking understated elegance—especially brides, professionals, or anyone wanting soft, neutral-leaning pastels with lasting shine.