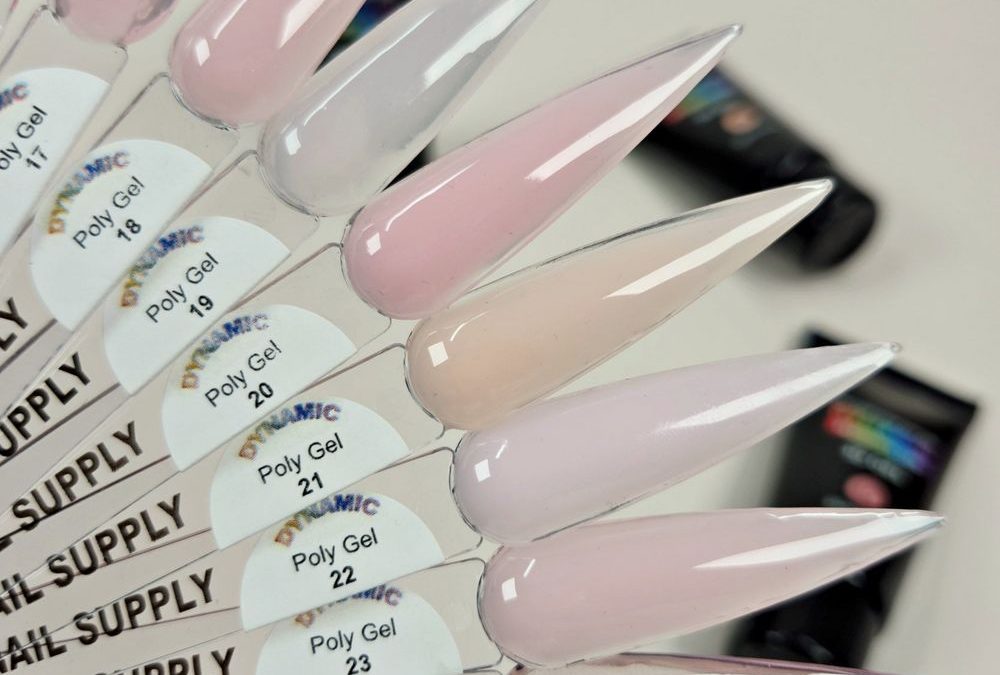
Do you want a soft, wearable French that reads modern but still feels classic? The baby pink french gradient—very light baby pink fading to translucent tips—gives you a polished, low-maintenance look that suits clients and busy DIYers alike. Below is a focused, practical workflow using the 12-piece neutral-to-pink poly gel set to build a seamless gradient on sculpted or natural extensions.
Create a stable canvas for blending
Start with clean, dry nails. Push cuticles back gently, remove any shine with a fine buffer where you’ll adhere product, and choose the correct form or dual mold for the length and shape you want. The poly gels in this palette have a smooth, non-sticky consistency, so you’ll want a matte roughen only where the overlay will bond. If you use dual forms or sticker forms, ensure they fit snugly to prevent product squeeze-out—this helps keep the gradient edge clean.
Map your color placement for the best fade
Pick one very light baby pink from the set as your base and a neutral translucent pink or smoky translucent taupe for the tips. Because these shades cure with a glossy cream/jelly finish and minimal translucency in places, plan to layer: a thin, milky baby pink first, then gradually add tiny amounts of the translucent shade toward the free edge. For bridal ombrés or softer fades, use more milky base; for a contemporary neutral look, bias slightly toward the smoky translucent taupe on the tip.
Technique: the feather-and-blend workflow
Work in small sections to keep control. Apply a narrow bead of the baby pink near the nail bed and a thinner bead of the translucent shade at the free edge. Use a small bead of slip solution on your silicone brush and very gently feather the junction where the two colors meet, pulling the pink toward the tip in quick, confident strokes. Because the gel is jelly-like and not sticky, it responds well to light feathering—avoid overworking or it will spread too thin and lose opacity. Cure in short bursts (a few seconds) if your lamp allows staged curing to anchor the layers without locking the blend completely too early.
Poly Gel #13: your go-to very light baby pink
Poly Gel #13 is the warmest very light baby pink in this collection, showing a soft, milky baby-pink tone in the swatches. Use #13 as your primary base for a classic baby pink French gradient—its jelly-cream finish lays down smoothly and gives a luminous, natural look when cured. Because it’s slightly warmer, #13 warms the overall fade and pairs especially well with the neutral translucent pink for a traditional, healthy-living-nail appearance.
Layering and control: how to avoid visible lines
Thin layers are your friend. Start with a sheer layer of baby pink across the entire nail to unify color, then build the tip with controlled beads and feathering. If you see a hard line after curing, apply a tiny amount of slip solution and re-feather the edge before the next quick cure. The product’s perfect consistency means you can sculpt small beads without them running; use a pointed brush to nudge color where needed and remember that light curing fixes the shape quickly—plan your strokes.
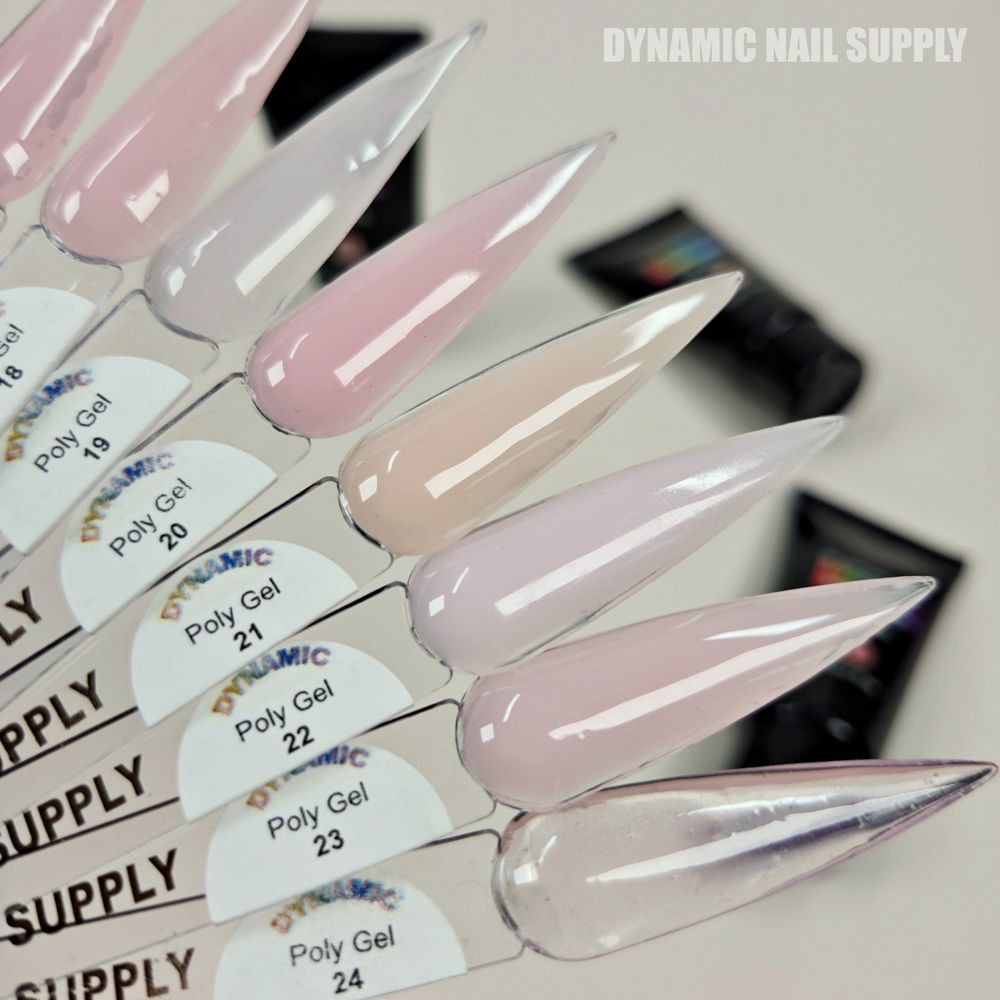
Shades suited for soft ombré and French fades
Shaping, refining, and finishing for a glossy cream look
After final curing, lightly refine with a fine file to perfect the apex and sidewalls. Minimal filing is usually enough because these shades have a self-smoothing texture. Clean away dust, then finish with a high-gloss top coat to enhance the jelly-like cream sheen that defines this palette. The glossy top layer also smooths any micro-lines left from feathering and gives that salon-polish shine suitable for everyday and office-appropriate wear.
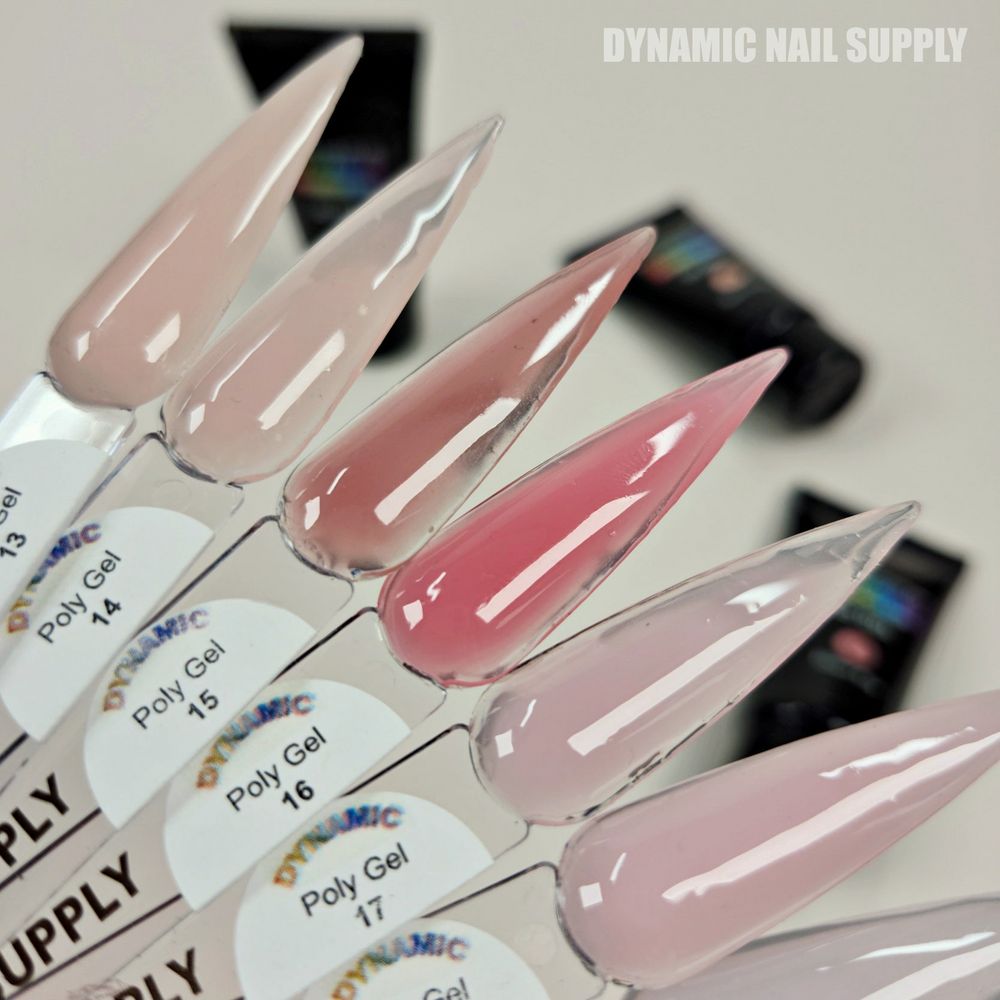
Smooth, glossy cream and jelly finishes
Quick checklist for a flawless baby pink french gradient
- Prep nails: dehydrate and lightly buff adhesion areas.
- Choose shape: select forms or dual molds for almond or natural tip shapes.
- Pick base and tip shades: very light baby pink (Poly Gel #13 recommended) + neutral translucent pink or smoky translucent taupe.
- Apply thin base layer of baby pink across the nail.
- Place tip bead of translucent shade; use slip solution to feather junction.
- Stage-cure if possible to anchor layers; fully cure when satisfied.
- Lightly file apex and sidewalls; clean and apply glossy top coat.
- Advise client on gentle wear and home care to maintain high shine.
Practical tips for salon speed and home convenience
If you’re doing multiple sets, prepare beads of each shade ahead on a palette to speed application. For home users, practice the feather stroke on a practice tip first—the jelly texture helps you control the spread without dragging. Keep slip solution and a small angled brush handy; the right brush angle shortens blending time and helps you preserve the neat crescent shape of a French smile line when desired.
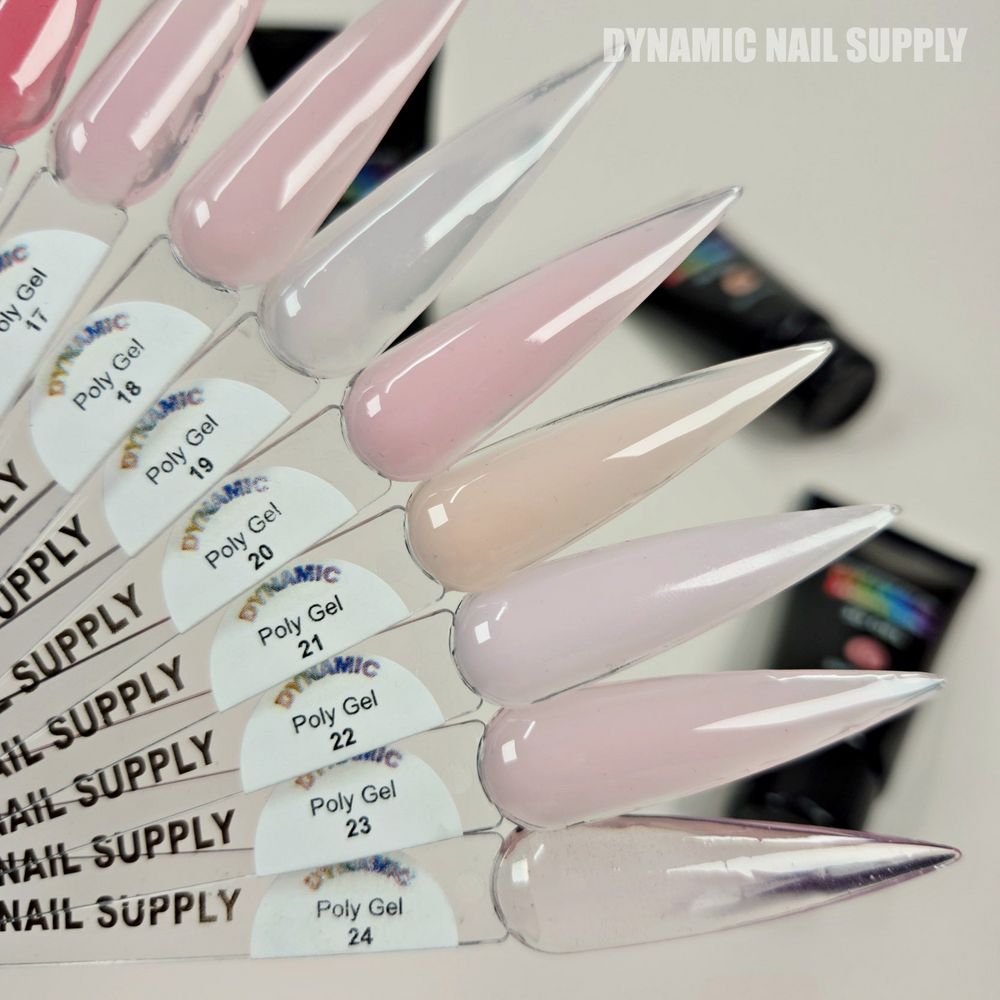
Coordinated neutral and baby-pink poly gel set
Safety and handling notes
Cure the poly gel fully under an LED or UV lamp following manufacturer timing, and avoid prolonged uncured gel contact with skin. Work in a well-ventilated area and use gloves if you’re sensitive to uncured product. Dispose of used wipes and uncured residues responsibly; store tubes in a cool, dry place out of direct sunlight.
Who should buy this set: If you do your own nails and want an easy-to-control, glossy baby pink french gradient, this 12-shade poly gel range gives you milky bases and translucent tips that blend predictably and look polished at a $6 entry price per tube (prices may change). For a quick look at the product to shop by shade, see the selection here: Poly Gel nude builder gel