
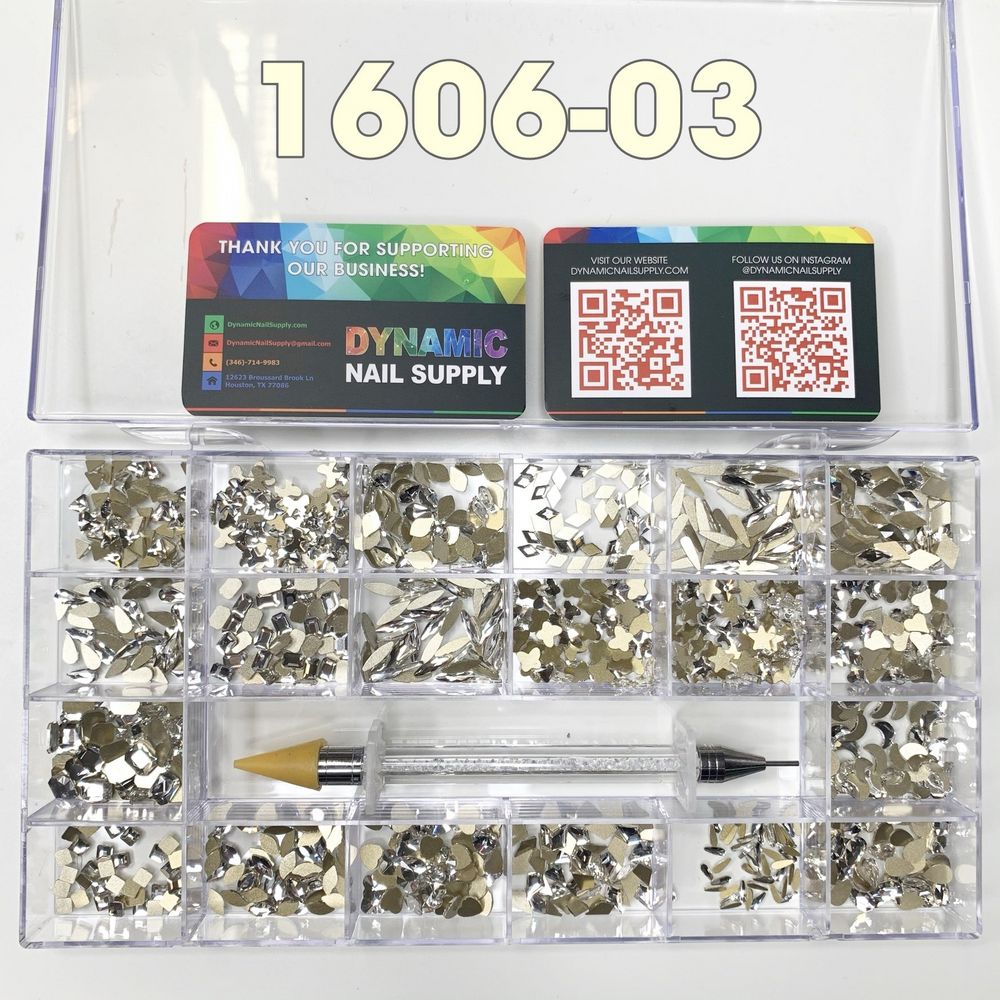
Adding crystal rhinestones is one of the fastest ways to take a manicure from plain to professional. With the right prep, placement technique and finish, a tray of small stones can become eye-catching accents that last through daily wear. This guide walks through practical, salon-style steps to apply platinum crystal nail rhinestones for long-lasting results.
Before you start, know what’s in the kit and how each item is used — then follow the sequence below for tidy, secure application. If you want to compare options or reorder, consider the platinum crystal rhinestone set: platinum crystal rhinestone set.
What’s included and why it matters
This particular kit contains 1,000 platinum-clear crystal rhinestones arranged as 20 different shapes with 50 pieces per shape, and it includes a single picker pen for placement. The stones have a reflective, golden backing that adds depth beneath the crystal face. The variety of shapes makes it easy to mix sizes for accent nails, borders, and sculpted patterns. The kit is priced at $45.00 but prices may change.
Prep: the foundation for a professional finish
Good adhesion starts with clean, dry nails.
- Remove old polish and oils using a non-acetone cleaner or rubbing alcohol so topcoat and glue bond properly.
- File and shape nails, lightly buff the natural nail plate where stones will sit to remove shine and create texture for glue to grip.
- Apply a thin base coat and cure if using gel. For natural polish, wait until the color is fully dry before applying rhinestones.
Placement techniques for crisp, even designs
Use a predictable workflow: plan, pick, place, and press. The included picker pen speeds up pick-and-place, but tweezers or a wax pencil also work well.
- Plan the design: lay out shapes on a practice sheet or the back of your hand to preview symmetry and spacing.
- Work one nail at a time. Apply a small dot of nail glue, gel adhesive, or a sticky topcoat where each stone will sit.
- Pick stones up with the picker pen tip or tweezers and place them gently onto the adhesive. Press straight down for a few seconds to seat the stone on the glue.
- For clustered accents, stagger sizes to create dimension; for border lines, keep spacing consistent and use a ruler or striping guide if needed.
Pro placement tips
- Start with the largest stones first when building complex designs to anchor the layout.
- Keep a clean work surface and use a small tray so you don’t mix shapes or lose tiny pieces.
- If a stone slips, gently lift and reposition before the adhesive sets — once cured, removal is harder and risks damaging the nail.
Sealing and finishing for durability
How you finish the nail determines how long the stones stay put.
- For gel systems: apply a thin layer of a gel topcoat around the perimeter of each stone (avoid covering the top surface fully if you want maximum sparkle), then cure per your product instructions.
- For regular polish: use a high-quality, fast-drying topcoat and apply two thin coats around the edges. Avoid thick coats that can dull the stones’ brilliance.
- Check edges after finishing and add a tiny bead of topcoat where needed to seal gaps that might catch on fabrics.
Care, safety, and removal
Treat rhinestones gently to prolong wear and protect the natural nail.
- Avoid picking or prying at stones — lifting them weakens the adhesive and damages the nail plate.
- When washing hands or using chemicals, wear gloves for heavy-duty tasks to limit impact on the stones.
- For removal, soften adhesive per the type used (acetone soak for many glues and gels). Follow safe soaking guidelines and consider professional removal if you’re unsure.
Who should use this kit?
This rhinestone assortment is ideal for nail techs who want a wide selection of shapes on hand, DIYers ready to step up at-home styling, and bridal or event stylists creating bespoke accent nails. The golden-backed crystals are versatile for seasonal looks and special occasions, and the included picker pen makes it accessible for beginners and pros alike. Dynamic Nail Supply carries this style for technicians and hobbyists who need volume and variety.
Short checklist before you begin
- Nail prep complete and base coat cured or dry
- Design planned and stones sorted by shape
- Adhesive ready and placement tools on hand
- Topcoat selected for your polish system
With a little planning and these salon-level steps, your platinum crystal nail rhinestones will deliver striking, durable accents whether you’re working in a salon or doing a detailed at-home manicure. Start simple — a single accent nail — then expand your designs as you gain speed and confidence.