Seasonal services are a reliable revenue driver for salons. Adding textured elements like 3D spider nail charms gives Halloween sets an instant high-impact look while fitting neatly into a repeatable professional workflow. This guide walks through practical prep, application, finishing, pricing and care so your techs can deliver spooky, durable results without sacrificing speed.
Why add 3D charms to your Halloween menu
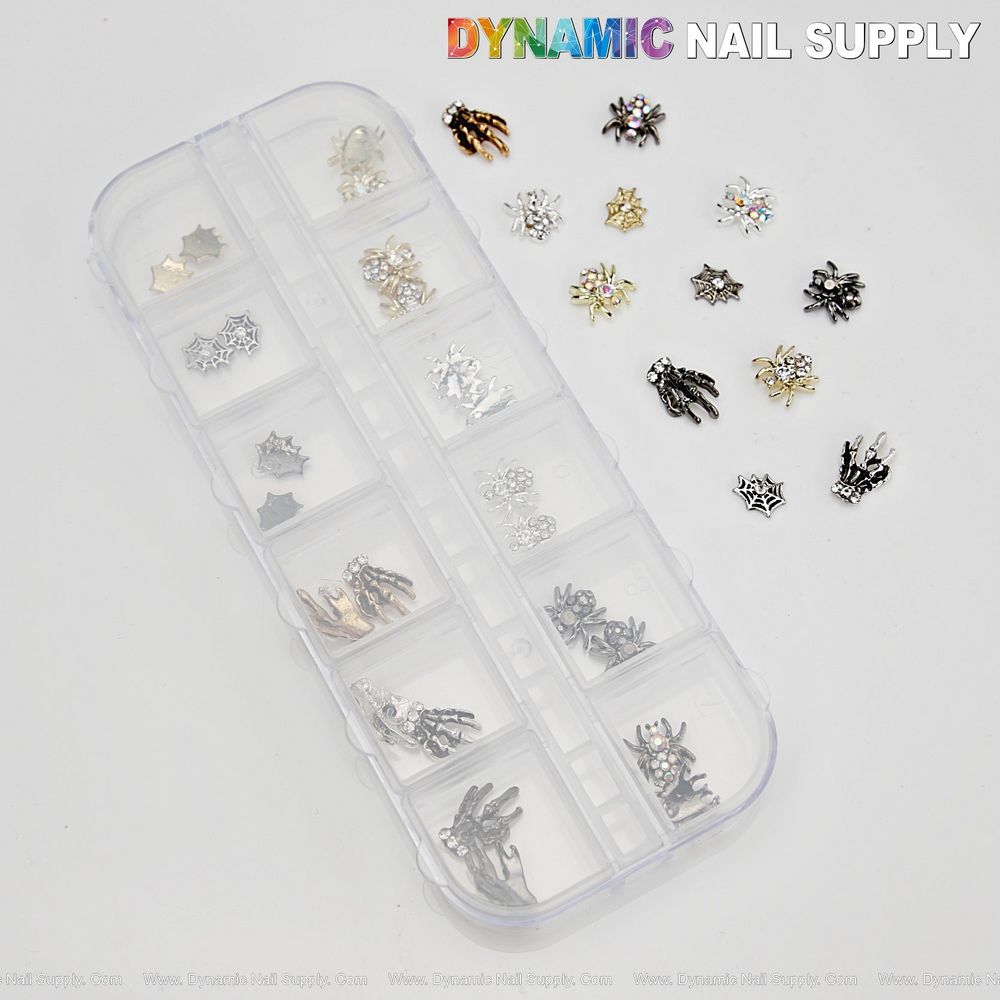
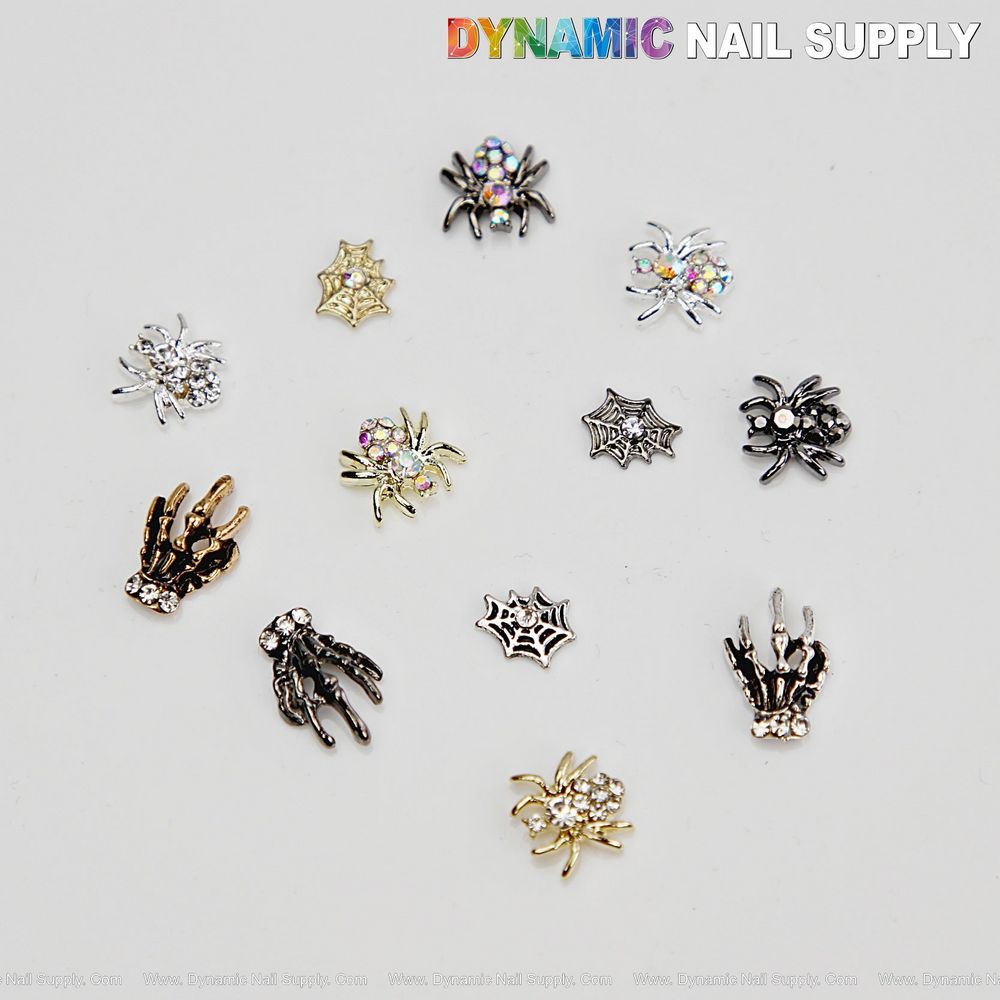
Three-dimensional charms create focal points that photograph well, encourage upgrades, and increase retail opportunities. These alloy Halloween charms—spiders, hands and skull motifs—are compact costume-friendly embellishments that appeal to clients wanting bold seasonal designs. Used selectively on accent nails they can elevate classic techniques (gel, acrylic overlays, or hard gels) into a themed specialty service.
Prep and selection: station setup for fast service
Consistency starts at the station. Lay out a small tray with a curated kit of 3-4 charm designs and sizes chosen for the typical client hand in your chair. Keep a backup supply nearby so techs don’t interrupt the service to search storage. Order a small 3D spider nail charms set to keep your charm offerings consistent for the season.
- Kit components: charm tray, small dotting tool or tweezers, two-part adhesive options (gel and glue), and a small dish for sealer or clear gel.
- Sanitation: wipe charm tray between clients and sanitize tools following your salon protocol.
Application: step-by-step for reliable adhesion
Integrating 3D charms into a salon service requires predictable steps so techs maintain speed without compromising longevity.
- Base and shape: prepare nails with your regular shaping, cuticle work and base layer—ensure the surface is free of oils and fully cured if using a gel base.
- Placement planning: have the client choose an accent finger before applying enhancements; trial-place the charm dry to confirm scale and orientation.
- Adhesion: for temporary Halloween sets, a strong nail glue over a lightly buffed area works well; for longer-lasting services incorporate charms into the overlay layer (embed under clear acrylic or gel) following product manufacturer instructions.
- Secure and cure: hold the charm in place briefly while adhesive sets; if using UV/LED-compatible gels to seal, cure according to your lamp guidelines.
Finishing touches: seal, sculpt, and style
Finish determines both durability and comfort. Small charms can snag, so a flush finish or partial embedding reduces catch while maintaining 3D impact.
- Edge smoothing: if the charm edge feels sharp, use a thin layer of builder gel or a careful acrylic skim to smooth the junction—cure and file to a neat, comfortable profile.
- Topcoat strategy: apply a high-quality topcoat or gel sealer around the base of the charm to lock it in; avoid pouring heavy layers over intricate details unless the design requires a pronounced dome.
- Client comfort: check for any roughness and advise clients about gentle wear during the first 24–48 hours.
Pricing, upsells and retail opportunities
3D spider nail charms are perfect for structured upsells: include one accent charm as a small upgrade or offer full-theme sets for a seasonal premium. Because these are eye-catching and seasonal, you can create tiered packages—basic Halloween accent, deluxe themed hand, or full-collection nail art.
Consider selling spare charm packs at the front desk so clients can replace a lost piece at home or recreate looks. Product packs are competitively priced; current inventory lists one variant at $7.99, though prices can change.
Who this fits in your salon roster
These charms suit salons offering trend-forward services: nail bars, boutique studios, and mobile technicians who do seasonal bookings. They’re especially effective for techs comfortable embedding and finishing small metal charms into acrylic or gel systems. If your clientele enjoys photo-ready, statement manicures, adding a charm-focused Halloween option can attract bookings and social media shares.
Care and safety notes for clients
Advise clients to avoid heavy impacts and to be cautious with fine jewelry or fabrics that can catch on protruding charms. If a charm loosens, recommend returning for a quick repair rather than attempting strong household glues. For salon staff, handle alloy pieces with clean tweezers and avoid prolonged skin contact with adhesives—follow your salon’s MSDS and PPE protocols when using chemical adhesives or monomer products.
Quick tips to train your team
- Run a 30–45 minute training focusing on placement, adhesion and finishing techniques for charms.
- Standardize a charm kit for every station to keep service times consistent.
- Build a photo library of approved placements and finished designs to speed consults and bookings.
Adding alloy Halloween charms like spiders, skulls and hand motifs to your seasonal menu can boost ticket averages and create memorable sets that clients want to show off. With a simple dedicated kit, consistent application steps and clear client aftercare, these 3D elements fit smoothly into a professional salon workflow and deliver a high-impact Halloween offering. For stock and ordering questions, you can contact Dynamic Nail Supply directly.